
Best Muscle Cars
The Best 11 Tips For Muscle Car Photography

Today’s lesson boys and girls is going to be on car photography.
Sit up straight, arms folded and pay attention. This is important.
It’s all too common to see car photos that are out of focus, badly cropped and badly edited, even for vehicles over $100,000. So it is now our job to make sure everybody can take great photos, so they can enjoy them for years to come.
The following tips can be used to take the type of photos you see in commercials and ads., but the real aim here is to help you take better photos of cars in general and be familiar with the elements needed to get a great shot of a car.
You can use these tips for getting better car photos for selling a car, for your own enjoyment or even if you have aspirations of becoming a car photographer.
Tools needed.
1 x camera.
1 x tripod.
1 x photo editing software.
1 x computer. PC or Mac.
6 x beers for when you have finished.
Cameras.
There are many different cameras from smart phone cameras to DSLR’s (digital single-lens reflex – the big fancy ones), to even bigger fancier medium format cameras.
With everything in life, you get what you pay for.
You don’t have to spend tens of thousands of dollars on a camera, you just stick to the rules of having a good lens and a good camera body.
Photography is all about light. The better the quality of light going into the camera and the larger the area it hits in the camera (the sensor or film) the better the image.
So it’s usually the rule that the larger lenses and larger camera bodies have better quality, but are the most expensive.
Medium format cameras
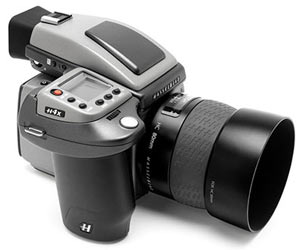
These cameras are generally used for commercial photographer.
You don’t need one of these, unless you have the money to splash out. They do take the most beautiful and most rich images, but you can expect to pay around $40,000 and that’s just for the camera body, not including lens.
They are also arguably not as good at being all-around cameras as the DSLRs below. They are made to get the very best of optimally lit scenes, where you have the budget to spend all day lighting and then you take the picture.
DLSRs
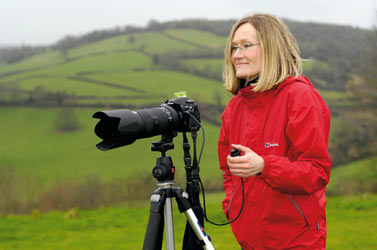
Image by digital camera world. (the little ‘green’ thing on top of the camera in the image above is a ‘spirit level.’ Straight images are important!)
DLSRs are the most common cameras to get the best quality and the best all-round functionality.
There may seem initially complicated, but really they just have lots of options as they are meant to work in any condition. You will come to love all these options to get real control of your images.
Most people go for either the Canon or Nikon brands.
for some of the best DSLR reviews online go to www.dpreview.com. I always go there when I’m thinking about buying a new camera body or lens.
The advantage with a DSLR is that you can change lens whenever you want.
Lens
Trying to sum up camera lenses in a paragraph or two when encyclopaedias are written on the subject, is quite hard.
I am recommending you to buy a DSLR, but you have to choose your brand ( most likely Canon or Nikon) and start with a 50mm lens. A 50mm lens is roughly the same as you see with your own eye, but as it is not a zoom lens you have to move closer or further away from your subject to zoom in and out, but a fixed 50mm focal length lens or ‘prime lens’ (a number like 50mm, instead of a zoom lens, e.g. 17mm-70mm) is always better quality than a zoom lens.
If you buy a zoom lens, the better quality ones are ones with the smallest zoom range, e.g a 17-70mm zoom lens will be generally better quality than a 17-300mm lens.)
For cars, don’t go below 10mm lens or you will get the fish eye look ( unless you want that.) Above around 110mm lens is probably too ‘telephoto’ for your needs.
Try to stay away from cheap third-party lenses, stick to the brand of your camera body.
A good lens will be expensive, but it will last you years. A cheap lens costs less, but you out grow it in no time. Cheap lens = False economy.
Smart phones
You can capture some great looking images on smartphones, especially with masses of post-editing software available.
But no matter how good the post editing software, the biggest negative of the smart phone is its very small lens. Essentially, it is a pinhole camera and you are relying very heavily on the sensor and software to do the heavy lifting for you.
So if you do have the choice, always go for a DSLR.
Tripod
Humans can’t keep still, we are not designed that way. We are made to keep moving.
Buy a full-size tripod and if you can, buy a ‘camera trigger.’ It will allow you to trigger the camera remotely with no vibrations. Once you own one of these, there is no going back.
Photo editing software
Processing your photos is fun and you need software to do the job.
Lightroom – Highly recommended – http://www.adobe.com/uk/products/photoshop-lightroom.html
Photoshop is the de facto standard, which you can use online – http://www.photoshop.com/tools
You can also buy the full-blown version of Photoshop here – http://www.photoshop.com/
For a free photo editing software, try ‘The Gimp’ (yes, its called that!) – http://www.gimp.org/
Adobe RAW file converters (Editing and turns RAW files into JPEGS) – http://www.adobe.com/support/downloads/product.jsp?product=106&platform=Windows
Computer
Most computers built in the last five years will have enough horsepower for your photo editing needs.
Preparation
You should have a camera (DLSR or smartphone), a tripod, a car, a scene, light.
You now have to experiment with the above elements to get the best photo. Simple!
Prepare the car
Just make it as beautiful as it can look. Wash, wax it, thoroughly clean the interior. Think of it like dressing and putting make-up on a model.
Setting the scene
Use your best weapons, your eyes. Scan a possible scene like you are a Security Droid.
You can get as creative as you want with this step, but the goal here is to get used to getting basic, great images of a car.
You can have driving shots, interesting backgrounds, motion blur, interacting with nature, night shots, panning shots, the list goes on. So starts with a location.
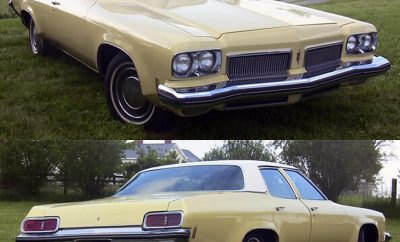
When choosing a location remember the car is the star. The location background should not distract from the car.
Ideas – top of a car park overlooking the city, an industrial part of town, derelict warehouses, next to modern architecture, on top of the crest of the hill, overlooking a landscape, sunset in the background, the first few hours after sunrise.
You could hire a fully professional studio or large indoor garage, but why pay for that when there are so many great locations.
Once you are happy with the scene you can then start to get creative with images like different angles, vantage points, minute details, even parts of the car no one else would think of taking a photo of. Everything is interesting on a car if it is taken in the right way.
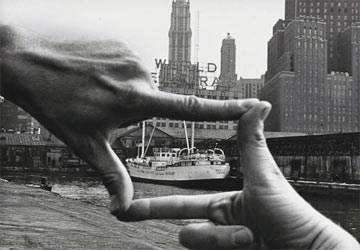
Look, look again, then look again.
Common things like fingers over lenses, cropping off an element of the car by accident, blurred images.
Rule of thirds
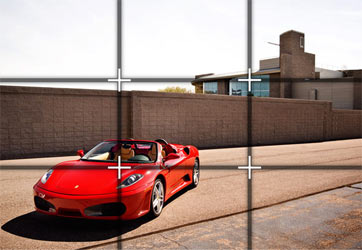 image – http://mag.desert-motors.com/articles/2009-0708-phototips.html
This will help you set the scene and position your car for the best photo.
The rule of thirds is simply a grid like in the image above which helps you position objects in your photo.
Simply position your car around where two lines cross.
Always put your horizon or where land meets sky around the top or bottom horizontal line. The example image has the horizon near the top line.
If you always use the rule of thirds grid on your camera ( you should have an option where you can overlay the rule of thirds grid over every image you take.) it should stop you cutting off edges of the car.
Lighting
Its now time to plan the lighting.
You can light your scene with loads of carefully positioned flashguns and lights or you can just simply use the natural light available.
For simplicity, we are going to use natural light. The hours after sunrise and before sunset usually gets the best light and the least amount of harsh shadows. Midday usually gives the most harsh shadows, unless you want that.
Knowing how to use a flash can make an average photo look incredible, but this is outside the scope of this article, so we recommend you read up on flash photography and experiment from there.
Shiny, bouncy light
Very shiny cars suffer from the same problem as photographing someone wearing glasses. Light bounces off their glasses so you don’t see their eyes. The same with some colors of car. In this case use a polarising filter. This filter can get rid of glaring light.
Some car colors are matt looking. These colors may look better in direct sunlight.
Night-time
This is where you will need to use artificial light, but the results are worth it.
One trick performed by professional car photographers is to take a series of images of the car with a light source at many different positions. The series of images are then edited together, so the final image looks like a car with just one light source, but done in a way which you just simply couldn’t capture with just one single image. Lots of time needed for this process!
Reflections
Some are good, some are bad, always be making visual notes of the reflections in the car.
The general rule – no reflections, as they are simply distracting. The car should be the center of focus, but let’s say a car has tons of chrome. A reflection on the bumper of an old street sign may look good, but you will have to evaluate this at the time.
You should not be a reflection on the car.
Camera settings
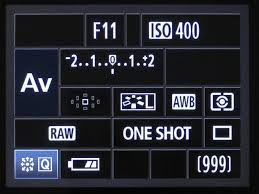
There are many different ways to skin a cat, rabbit, octopus….. Whatever the saying is, but it is the same with the many options on a camera.
It depends on the situation.
You can put any camera on fully ‘automatic’ and let the camera decide the settings for you, but you will soon outgrow this and eventually go to fully ‘manual’ mode. This will allow you to change settings to exactly as you want them.
‘F’ numbers
Basic rules are lens ‘F’ numbers = the bigger the ‘F’ number, e.g. F16, the smaller the hole in the lens which makes everything in focus front to back. The smallest ‘F’ number, e.g. F2.5 has the biggest hole in the camera lens or aperture, which will usually makes only the things in the foreground in focus, everything in the background is usually blurred.
But this depends…………..
you may have a small ‘F’ number setting to just get the car in focus and everything in the background blurred, but if this is a landscape shot and you are more than say 10 m away from the car, the background may still be more in focus than you like.
Experiment.
Shutter speed
The faster the shutter, the quicker the camera captures the image.
Usually, the faster the subject is moving or brighter the light, the faster the shutter speed, but again there are caveats.
You can take a picture of a moving car with a slow shutter speed which will make all the background blurred and the car in focus. Again experiment.
Shutter speed and F numbers go hand-in-hand, you alter one and the camera alters the other.
ISO
Like the old film speed. In the old film days, if you were planning on taking images in low light, you bought a higher ISO number film. Tons of light = a lower number, e.g. ISO50. Now you change that on the fly with your digital camera.
Most situations are ISO 100-400, so stick to that range for starters. If you have near to no light a high ISO number is better, but the higher the number goes, the grainier the image becomes. Its a trade off.
Low light = slow shutter speeds, so need more light or up the ISO and/or lower the ‘F’ number, but low ‘F’ numbers give a shallow depth of focus….arghhh!
White balance
This dictates how natural the colors will look.
Professionals will take a test image of a ‘grey’ card, which is a neutral colored piece of card.
When they post edit, they sample the grey card’s test image color and use it to color correct the rest of the images.
Unless I am getting creative or on a professional job, I will usually set this to either neutral or automatic, then color correct in software.
RAW or JPEGS?
I have to mention this as it is a pet peeve of mine.
RAW images – are essentially like digital negatives. They are the basic information of the image, which allows you to post process the image without degrading it.
Jpegs are a compression format. Essentially, you are letting the camera decide how the image should look. When you post process the image, each step will slightly degrade the image as it has already been processed.
If you have a DSLR or even a more compact camera, you should be able to shoot in RAW or JPEG versions.
Only shoot in RAW format, unless you’ve little space left on your camera’s memory card, then JPEGS are allowed. I think of the situation as the same as having a film negative or a Polaroid. Polaroids are okay for instance images, but not the best images.
….. Calm down, breathe!
Start with ‘auto’ mode on your camera and note the shutter speed, ISO and F number, then gradually go through the manual settings, one at a time, so you know what setting changes affect you images.
Its a juggling act.
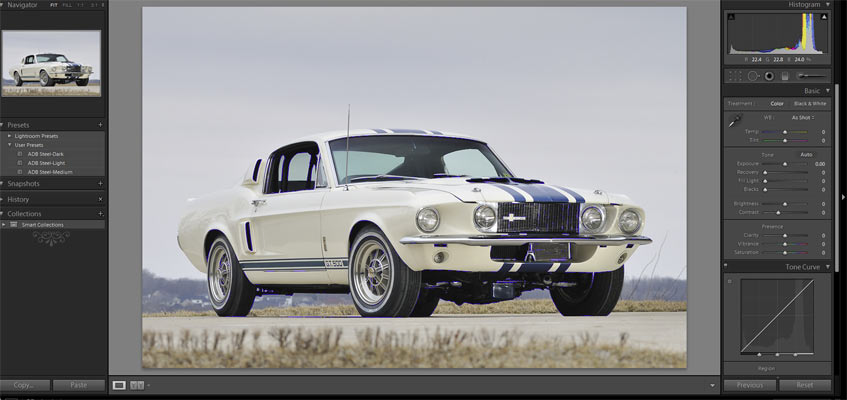
Post Editing
You can take the photos straight off your camera as-is, but some post-editing will always help.
As I always shoot in Raw format, this file type needs to be turned into a .JPEG or .TIFF file.
My tool of choice is Adobe’s Lightroom. This is basically a ‘digital darkroom’ allowing you to edit the image without further processing. Most of the time I don’t even use Photoshop, I just live in Lightroom.
Most digital SLRs will have free software to convert raw files to any other file type. Most will enable you to do the same edits you can in Lightroom. Lightroom is just a more fully featured product.
White balance, Levels, Contrast
There are so many different edits you can do in the post processing of an image, but tweaking the basics is a good starting point.
The white balance is the general color temperature of an image. Too ‘cold’ and your image will look like it has a blue filter. Too ‘warm’ and it looked like it has a yellow filter.
Your aim to get the most natural colors, which is usually somewhere in the middle. Advantage of RAW files – white balance is easy to tweak with a RAW file, a pain with JPEG’s. You never want a scenario where a potentially good photo is lost because you took it as a JPEG and can’t tweak the white balance.
Levels are how light and dark the most light and dark parts of the image are viewed. If something looks too dark in an image, you can move the levels to make the darkest parts of an image, slightly lighter. If you want a more basic version of levels, you can use the familiar contrast setting.
Cropping
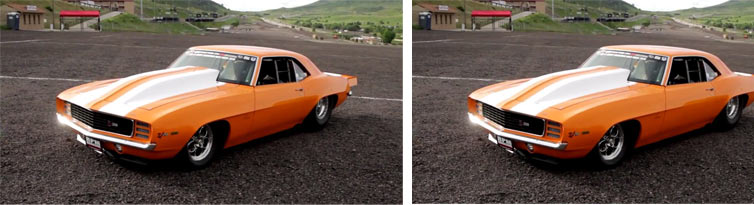
A simple way to think about how to crop an image, is to use the ‘rule of third’s’ above.
If you make sure your car is roughly around where two lines intersect and no element of the car is outside the image, you should be roughly in the ballpark.
A well cropped image can make the difference between an average image and a great image.
Check out the image above as a comparison.
The more you learn about how camera works and your post processing software, the better your images become.
Tip – play with one camera setting at a time with the same scene, e.g. ‘F’ numbers. Use the full range of numbers, the same scene and compare the images.
Beers
Available from most outlets.
For the last step in the process after all work is completed….. and only then!
If you stick to the basics, the simple rules and are very observant, continually checking all the elements of an image, you should end up with some fantastic car photos, which you should be proud of.
I think of taking a photo as the opposite process of painting a picture.
With photography you build and light the scene as you want it, then you take the photo. Clicking the shutter button is just one element in the process. This is why movies have a ‘Director of photography.’ They know how to build and light any scene to make it look its best.
So the next time someone says photography is just clicking a button, tell them ‘yeah, …and Van Gough just held a paintbrush!’
Resources
Beginners to advanced tutorials – http://www.carphototutorials.com/tutorials.html
Photo software
Lightroom – Highly recommended – http://www.adobe.com/uk/products/photoshop-lightroom.html
Photoshop is the de facto standard, which you can use online – http://www.photoshop.com/tools
You can also buy the full-blown version of Photoshop here – http://www.photoshop.com/
For a free photo editing software, try ‘The Gimp’ (yes, its called that!) – http://www.gimp.org/
Adobe RAW file converters (Editing and turns RAW files into JPEGS) – http://www.adobe.com/support/downloads/product.jsp?product=106&platform=Windows


2 Comments